September Update

With the official start of autumn, I thought I would take some time to write to all my followers to let them know what is going on with me.

???????????????????????????????A quick recap, August 7th – 10th was the Ontario Summer Games , which was  held in Windsor Ontario.  Since I am no longer eligible to compete at the Ontario Summer Games, because I have competed at the Canada Games, I decided to coach the Eastern Zone team.  This year was supposed to be Niagara Falls but there was a change in plans and the city of Windsor was kind enough to take over. They did a very good job with such sort short notice.

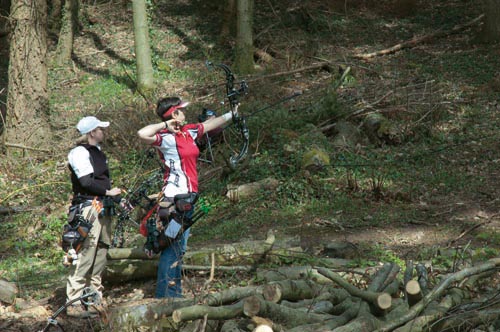
???????????????????????????????Being the coach at an event like this was a very different experience for me. At times I forgot that I was not shooting and other times various people forgot I was the coach.  One great experience was coaching my little brother Joshua, at 14 years old, in a very competitive field in his very first summer games.  The other athletes seemed to tower over him and yet he was able to capture the Men’s cadet recurve silver medal.  This year delivered the best results for the eastern zone archers since I have started participating, with almost half our athletes going home with medals.   I would like to believe in some small way my coaching assisted our athletes, probably not since they are all amazing athletes without my help, but it is nice to think about.

Recently, I had a couple of questions posted to my website and thought I would take time to answer them now….

My 3X10 arrows for 18M/40cm score is ~ 175 for a long time (both indoor and outdoor). I feel hard to improve the score/consistency. How can I make a breakthrough? I am a 12 years girl. Maybe I should buy more expensive arrows?

Having had been 12 at one point of my archery life, I can understand the frustration you are feeling. Unfortunately, I don’t know a lot about your set up, or form, or even how much you practice. However, that being said this would be my advice to you. (Assuming form is fine) I would try to see if there is a better arrow spine that would work better for you and maybe try to see if you can increase your draw weight a little (do NOT jump too much if you can’t handle it). The draw weight should help you get some more speed off the arrow making it more forgiving. The arrow spine/type sounds like it could be the main issue, you may not have enough or you may have too much flexibility in your arrows for your draw weight so it is causing it to fly crazy. Keep in mind given your age you may have to change a lot because you are at a point in your life where your body is making a lot of changes too, like your height. Remember when you are making changes it is just like a science experiment, where you change only ONE factor at a time otherwise you don’t know if you are making it better or worse, and you won’t know what is causing it.  Also make sure you remember where everything was before you make changes so that you can go back to it if worse comes to worse.

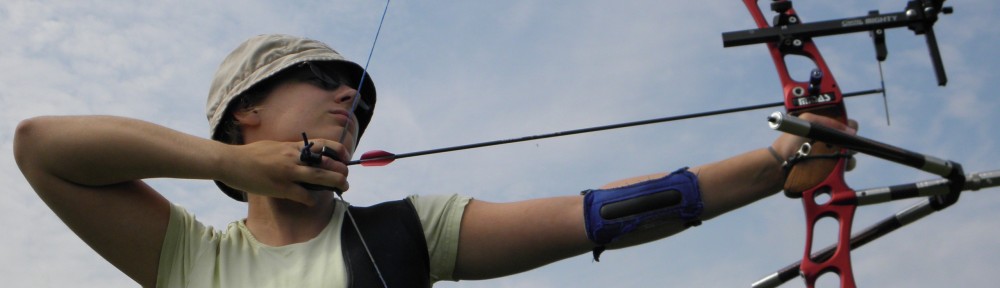
How to avoid bow arm (and shoulder) drop right after release? My understanding is that the bow arm should be strong and straight, and only drop the bow hand (dog sit) with the help of sling. My bow is very heavy; I have a tendency not to hold the bow strong after release. Maybe my bow is too heavy. I also shoot very fast because of not to holding bow long enough. How can I overcome these bad habits?

If you are finding it hard to hold the weight you have, then yes you should take off enough weight so that you can hold and control the bow.  Periodically I take off the weight, so I can make sure I have the basics of archery correct. Don’t worry, practicing and training will allow you to reintroduce the weight back in no time whatsoever, but listen to your body first and foremost.

It is important to stay strong and straight throughout the shot however remember not to be tense. When you see other archers “dropping” their wrist, this is result of the stabilizer when it moves with ease, out of your hand and swings itself down. So it looks like your wrist is bending but it really isn’t, your wrist is just tagging along for the ride.

Concerning shooting too fast, if you are finding you don’t have enough energy between shots as you practice or compete, you should practice waiting a little bit of time between shots. This is the 10th step in the 10 steps of archery.  It is important to take your time as well as be fluid with your form, so that you are building up the power to shoot the shot.

I hope this helps, 🙂

redeemerunivThis summer was very nice, it was a much-needed break from the university grind and an opportunity to shoot, work and enjoy life. I’m kind of sad to see the summer ending and having to leave all my friends and family behind once more, but on the bright side I get to see all my new school friends again. This school year should be a lot of fun looking forward to it, and I’m really looking forward to diving deeper into my chosen field of study (Kinesiology) after completing most of my mandatory subjects.  This year will be special as my younger sister has also chosen Redeemer University to study and I will always have someone around who gets me and is ready to give me a hug if I need it.  She has chosen to study International Development in hopes that she can work for a NGO and change the world for the better.

I know I should be blogging more however my first priority is university, and if there is time for anything else I will do it.

MICA 2014

IMG_1785This past Wednesday, South nation archery supply held an awards ceremony; everyone did extremely well this past indoor season.  Sydney, Josh and Cole all did very well this year winning several club and provincial medals. This past year, I was able to participate in a couple of tournament, however for me it was nice to see everyone again after being away for school.  My highlight from this past indoor season was the MICA team event.

The Multi-Indoor Championships of the Americas OR MICA for short. MICA is only one of very few indoor International Championships that is open to all archers that you do not have to travel for. Designated host archery clubs throughout North and South America host tournaments for both individuals and teams to submit scores from January 1 – April 30. Male or female archers can compete individually in cadet, junior, senior or master categories in either compound or recurve. Additionally clubs can also host junior or senior male or female teams in either compound or recurve, provided they are all from the same club.

Since it is a FITA sanctioned event, individuals submit their score from a double indoor FITA (60 arrows) and the team event submit a FITA team score (24 arrows) where each archer shoots 2 arrows alternating for four ends. This is one of my favorite events and one of the few times you can practice the team event.

IMG_1891This year, I shot with my sister Sydney, and our friend Lindsay and we captured the Silver this year behind the Brazilian team. On other exciting, my brother Joshua shot with his two friends, Josh and Kaleb Parker, participating in as a Junior team [all who are not Juniors] and shot new Canadian record for Junior Men Recurve Team division with a score of 211, however finished in fifth place overall.

Congratulations to everyone at South nation for another successful year. A special thanks to our coach Kathleen Miller and Larry Smith for all their hard work this year.

A field guide to archery

Reblogged from Bow International:

Field archery is the ultimate challenge, whatever your bow style, and many of the world’s elite concur that their field exploits represent their finest achievements in archery. The accuracy that a quality target archer brings to this new experience is an obvious asset, but a greater set of skills need to be honed if one is to master this testing, yet satisfying, aspect of shooting.

My return to the sport as a Masters competitor, with time as an ally in retirement, yielded National Championships and then world gold in both FITA and IFAA disciplines. But I must stress that this was not done without considerable focus, practice, and knowledge of my recurve equipment. The transition to ‘the dark side’ has required a reassessment of those field skills, and a re- education of what exactly my compound is capable of under field course conditions. It has been a fun challenge so far.

DSC_8149 copy

So what exactly does a target archer venturing out into the woods need to learn, in order to reach a reasonable level of competence around a field course?

Read More…

Excellent article about field archery!

Archery: One of the Safest Recreational Sport… No Really!

safety-firstThere is often a misconception that archery is very dangerous. Although a bow and arrow can be a lethal weapon, archery is actually one of the safest sports because there is a culture of safety. Statistically, archery is one of the safest recreational sports there is with only 0.65 injuries per 1000 participants as outlined in the USA National Electronic Injury Surveillance System and represents the hospitals which actually record the information. Check out the Archery Safety report from Arizona State and Fish Department from 2004.

This is largely because of the culture of safety that encompasses the sport. All coaches start by instructing their students with the fundamentals of archery safety. I remember my first lesson was about safety first. Nowadays, I regularly shoot through my house for practice and we never worry about danger because of the culture of safety within my house. Everyone follows the basic archery safety rules. For archers there are two basic areas of safety that you should maintain, personal safety including equipment and field or range safety.

Personal Safety

  • Always shoot with well maintained equipment and arrows
    • Always inspect your equipment and arrows before shooting
    • Before shooting each arrow inspect the arrow and nock for damage
    • Cracked or bent arrow must never be shot.
  • One should always use a bow-stringer for longbows and recurve bows. This will reduce the possibility of damage to the bow and injury to the person.
  • Shoot with good archery form ensuring you wear proper attire and a properly positioned arm-guard.
  • Never, ever shoot while intoxicated or with anyone who is.

Good Rule of Thumb: If in doubt, stop and get it checked it out.

Field and Range Safety

  • When shooting…
    • Do not shoot with ANYONE in front of the shooting line
    • Do not nock an arrow while anyone is in front of the shooting line
    • Only nock an arrow whwn you are on the shooting line and after the signal to start shooting
    • A loaded bow is only pointed at the assigned target
    • NEVER EVER point an arrow at anyone, whether on a bow or not.
    • Arrow must never be shot straight up into the air
  • When not shooting
    • Pay attention and be respectful of other archers
    • Once finished shooting you must be behind the shooting line and paying attention
  • When retrieving arrows from the target
    • Leave your bow behind the shooting line (hang-up your bow), you will need two free hands to collect your arrows from the target
    • Always walk forward to collect the arrows, never run.
    • Always pick-up arrows on the way first. Whether they yours or not.
    • Always walk up to the side of the target butt, so as to not to accidentally walk into the rear of the arrows lodged in the target.
    • One person at a time should withdraw their arrows from the target.
    • When withdrawing arrows from the target, ensure no-one is standing behind you. Pulling arrows may require a lot of force and they can come out of the target suddenly and could hurt someone standing behind them.
    • When carrying arrows, always hold them to your side with the points down.
    • Make sure that EVERYONE has returned behind the shooting line before starting the next shooting end.

Individual ranges may have additional rules specific to their courses, all ranges will adhere to the basic archery range safety rules. Whether you are a beginner or an experienced professional archer, if we all continue to practice the culture of archery safety we can enjoy the sport for many years to come.

My Bow

IMG_7304Recently, one of my Tumbler followers asked me to share the details of my competition bow since they were moving towards competitive archery and wanted to know about my bow. First, I will explain the story of how I got to my current bow.

I have been searching for the perfect bow for me since the day I started shooting. Finding the perfect bow takes experimentation, trial and error. Your bow is a personal preference, so much so that in ancient times, it was a person’s most treasured possession and many kings were entombed with their bows. Finding the perfect bow may take years… and it may change as you grow, change and develop.

When I was just starting out at 9 years old, I needed a light mass weight bow. Something that would not damage my bow arm long term however would allow me to practice a lot. I was a good shot however VERY small for my age. I was able to come across the Fiberbow riser with a mass weight of only 599 grams, less than half the weight of other bows and it allowed me to practice a lot with less fatigue. This was a great bow until a couple of years ago, when I became stronger than the bow.

So before training for the Canada Games, I switched to the Cartel Midas 25” riser. I love that bow, it helped me win a Silver at the Canada Games and it took me to the World Indoor Championships in Las Vegas . This was an awesome bow for me as a cadet, however, with the change of divisions and greater distances as a junior I need to generate more power for outdoor shooting. Therefore I switched to a 23” Midas Riser and increased my limbs to 36 pounds. On initial tests I was able to top 196 feet per second and had to add additional weights to consistently settle on 194.5 fps. This is high for a recurve archer with only a 25” draw length.

IMG_7317My new bow is as follows…

  • 23” Cartel Midas Riser
  • 36# MK Archery Medium 1440 limbs
  • Cartel Spectra Sight
  • Cartel XD Stabilizer system with Midas V-bar
  • AAE Extended Clicker
  • Cartel Rest
  • Cartel Cushion Plunger
  • Custom String

Wow, this bow is amazing; I hardly feel the shot. The limbs are the smoothest I have ever shot. The limbs use carbon foam-core technology and are extremely smooth and straight. I love my new bow and it is the perfect bow for me right now. Although bow selection takes time and experimentation I hope you too can find the perfect bow for you.

Rests

Basically an arrow rest is part of your bow setup that holds the arrow in place, ready to be shot. Allen asked…

What kind of rest would you recommend for a beginner recurve shooter? I’m a COMPLETE newbie to archery, so I blindly went with the archery shop guy’s recommendations when buying my first bow. I ended up buying a Samick Polaris that he set up with a rug rest. Is this a bad kind of rest to use? Wouldn’t the two non-index fletches hit the bow on the way out? My arrows tend to hit the target at an angle instead of perpendicular, so I wonder if the rest could be causing it.

First lets cover the various types, most people say there are four basic types of arrows however I believe there are five; shoot-thru, containment, drop-away, pressure/plunger rests and the additional shelf. The shelf is often overlooked because it is part of the bow, however you do “rest” the arrow on it.

Here is a general overview of each type.

Shoot-thru (or prong) rest : A two-pronged arrow rest with a gap between and spaced about two-thirds of the width of the arrow to create a cradle. The arrow sits on top of the prongs with one fletching pointing down between them and is usually spring-loaded to allow additional clearance for the fletchings. These rests can be tricky for beginners because the arrow can fall off with wind or bad form.  They are best for hunting and the use of a mechanical release.

Containment rest : A totally encircled or a simultaneous 3-point contact arrow rest holding the arrow completely in place until release. These are the most common choice for archery hunting, they are relatively easy to install and tune. Great for beginner hunters since the arrow will not fall off the rest.

Drop-away (or fall-away) rest : Designed to drop out of the way upon release and therefore eliminate any chance of contact with the arrow. Activated by the release of the string, the rest holds the arrow long enough to keep straight and needs to drop out of the way before the fletching reaches the rest. Since this can be very tricky to tune; it is best suited for a compound bow. It is popular for hunting with large fixed-blade broad heads and helical fletchings.

Pressure/Plunger rest: Used commonly by finger shooters (no-mechanical release), they are designed to counter-act the horizontal oscillation from release with your fingers. Standard type bows without a cut-away, typically use a simple flipper rest (a rest with an additional “flipper” that acts like a plunger to help push-back against the pressure). Bows designed with a cut-away for your center shot typically use a rest along with an adjustable plunger. A pressure rest is used on Olympic bows and can be used be any finger shooter.

Shelf: Most traditional longbows and modern recurves bows are now designed with a cut-away area in the riser which includes a shelf area. For this type of bow instead of a pressure rest you can choose to shoot off the shelf. An arrow rest is attached to the shelf of your bow and is usually installed with an arrow plate to the side. They serve as protection for the bow and arrow and act as a soft, smooth surface for the arrow to be shot from.

Selecting a rest depends on a list of things including…

  • Type of bow (compound or recurve)
  • Chosen application (hunting or target shooting),
  • Type of release (finger or mechanical)
  • Budget (cold hard cash)
  • Experience (your ability to tune the rest and bow)
  • Form (some rests are more forgiving)
  • Tradition and historical nostalgia
  • Competition division (division restrictions)
  • And personal preference (bling factor)

There are a ton of rests available on the market and most bow manufacturers follow the same AMO (Archery Manufacturers Organization) standards. Therefore the drilling and tapping for the majority of bows are universal however before you purchase or upgrade make sure a selected rest will work and function with your bow.

A rug rest is a type of rest for a shelf and could be a very good selection for your shooting style if you are shooting traditional however it would not be the best selection for an Olympic archer or a compound hunter.  I am not in a position to recommend the best rest for your bow, since the bow is only as good as the alignment between the rest, release and nocking point. Obliviously, a better quality rest for your style of shooting can impact your accuracy.

To specifically address… My arrows tend to hit the target at an angle instead of perpendicular, so I wonder if the rest could be causing it.

A rest is only one small piece of the bow, and has very little to do with controlling the oscillation of the arrow. I would personally need to watch you shoot and inspect your bow to provide any valued and specific advice. There are a ton of things that can cause your arrow to impact the target on an angle. The bow may need tuning, you may be plucking the string, the arrows may be too stiff or too flexible, and a lot of other things.

Quick Insight: “Bows only perform actions as directed by you; so make sure you have good form first.”

For more information on good form check out my website page The 10 Basic Steps of Archery and to understand controlling arrow movement such as oscillation, check-out the complete Arrow – The series.

Commemorating the 20th anniversary of Barcelona 1992 Olympic Games

On 24 September 2012, two flaming arrows were shot in unison and in synchrony with the music of the opening firework ceremony of Barcelona’s prestigious Mercè Piromusical 2012. This commemorated the 20th anniversary of the Barcelona 92 Olympic Games.

Read all about here…

Awesome video of the ceremony, check it out.

Arrows Series – Part 7: Center Shot and Archer’s Paradox

Now that you have determined the arrows you should use you need to fine-tune your bow to maximize your arrows consistency. Most people think that once you set up a plunger and a nocking point it is all good to go, however that is not the case. The center shot of your arrow is one of the most over looked things when setting up a bow.

The center shot is where the arrow rests on the bow when looking behind it.  When setting up your center shot the arrow needs to be completely behind the string. Most traditional bows do not have a cut-away in the riser and the arrow has to deflect around the handle with something called archer’s paradox.

Archer’s Paradox: The term was coined by Robert P. Elmer in the 1930s. The paradox refers to the phenomenon that in order to strike the center of the target, the arrow must be pointed slightly to the side of the target. Modern use of the term has caused the interpretation of it to be corrupted and the bending of the arrow is often considered incorrectly to be archer’s paradox.

In order to be accurate, an arrow must have the correct stiffness, or “spine”, to flex out of the way of the bow and return back to the correct path as it leaves the bow. Incorrect spine results in unpredictable contact between the arrow and the bow, therefore unpredictable forces on the arrow as it leaves the bow, and therefore reduced accuracy.[1] Additionally, if an archer shoots several arrows with different spine, even if they clear the bow they will be deflected on launch by different amounts and so will strike in different places. Competition archers therefore strive not only for arrows that have a spine within a suitable range for their bow, but also for highly consistent spine within sets of arrows. (Wikipedia)

For an Olympic archer, ideally your set up should be 100% behind the string. Some people actually require the arrow lean a little to the opposite side of your riser so that the arrow can get past the bow without hitting it. You can reduce the effects of “Archers Paradox” by adding spin to the arrow by fletching your vanes or feathers with an offset or helical. It is critical that the arrow must have the correct spine so it can bend around the bow, so the fletchings do not touch anything for consistent arrow flight.

Therefore, once again I stress, for proper safety and best performance, arrows need to match your entire bow setup.

2012 Ontario Target Championships

This past weekend, Algoma Rod and Gun Club in the Sault Ste Marie hosted the Ontario Provincial Target Championships. Sault Ste Marie is situated in Northern Ontario on the eastern point of Lake Superior and 12 hours away from Kingston. Wow, what a long drive for my family, and to give some perspective, in Europe you could travel from Rome, Italy to Frankfurt Germany in the same amount of time. Although it was a long drive 85 of the top archers from around the province travelled to compete in the two-day tournament with a FITA 1440 on day one and a FITA 720 on the second day.

Upon return from the National Championships in British Columbia, I finally received my amazing new bow from Cartel Doosung.  With only two weeks of practice, typically you wouldn’t change anything however this bow is perfectly suited for me; possibly the best bow I have ever shot. Since this is really the last competitive tournament of the outdoor season, I decided to use it.  In my opinion, it was a very good decision. The winds were extremely tricky; flags on targets beside each were other pointing in opposite directions. Every one was having troubles with them. For only two-weeks practice I feel I shot extremely well, perhaps the best I have shot all season, and was able to capture the Bronze medal.  I know this will translate into success in the upcoming indoor season and next year’s outdoor season.

This tournament was also a complete family event as all my siblings participated. My sister Sydney competed in the female cadet recurve division finishing fourth. Joshua competed in the Male Cub Recurve division finishing second, even though he could not complete the tournament because of a shoulder injury. Last and not least, my youngest brother Cole competed in the Male Pre-cub Recurve Division also capturing silver.

It was a great successful tournament and a great family trip since we camped at the KOA campgrounds. I am already looking forward to next year’s family tournament trip.

Shooting with a Clicker

Every competitive Olympic recurve archer uses a draw length checker or “clicker”. A clicker is a device that assists an archer to draw their bow consistently.  The clicker rides along the side of the arrow and produces a “clicking” sound after it passes over the point, hence the name “clicker”. By consistently measuring the draw length of the arrow, you get a consistent power off the bow and therefore a more consistent grouping of arrows resulting in better scores.

There is a lot of debate of when you should start to use a clicker. Anyone who wants to advance and develop smaller groups should start using a clicker as soon as possible. HOWEVER, since clickers take a lot of discipline, patience and practice, maturity is the key factor; age maturity and shooting maturity. If you are disciplined and maintaining consistent form, then you are ready for a clicker.

Recently, one of my readers asked:

I just wanted to ask, with regards to the form, if I should be expanding my chest during the draw (pulling your shoulders back towards the spine) in order to activate the back muscles to take the load rather than the arms.

Shooting a clicker is a relatively simple process however; it requires the use of back muscles to create something called back tension. By compressing the rhomboid major muscles (between the shoulder blades and spine) together, it will draw the arrow past the clicker for the shot when you are at full draw.

First, you need to determine the ideal location for your clicker. Have a friend mark where the tip of the arrow is at full draw. This will be the initial starting location for your clicker. There are tons of clickers on the market however there are two basic types of clickers; riser-mounted or sight-mounted. Depending where the initial starting location is measured it will help you determine the type you need.

Once you have mounted your clicker follow this shot process.

  1. Nock the arrow, with the arrow under the clicker and on the arrow rest.
  2. Raise the bow and draw towards your anchor point.
  3. Continue to draw the arrow until the tip of the point is still just in contact with the clicker.
  4. Aim and while still maintaining, squeeze your rhomboid major muscles together.
  5. Once you hear the “click”, relax your fingers and finish the shot.

It is important that you are able to reach your anchor point at full draw. The clicker needs to be within the distance so your rhomboid major muscles can activate the shot. Remember, over the course of an entire day of shooting, your muscles weaken and you will have to work harder to draw the same amount, it may need to be adjusted to find the ideal location for entire day of shooting.

Important: Once you have determined your clicker location, leave it alone. Making any adjustments will affect all your sight marks, and they will need to be adjusted too.

If you have never used your rhomboid major muscles before this is going to take some time to master. Practice using your rhomboid major muscles with the following exercise.

With palms down and your forearms parallel to the floor, bring your fingertips together at chin level. Try squeezing your rhomboid major muscles together. You should witness your fingers spread apart about an inch. This is all the space you need to activate the clicker at full draw.

You can also check out this website for exercises to help develop strength in your rhomboid muscles.

The mastery of a clicker is essential for any competition archer. You will need to work on it regularly however once you master the process a clicker will become your best friend.