The Evolution of the Riser

2012-MidasIn this series I am going to discuss the evolution of the riser or the structural strength of the bow which houses the handle, to which the limbs are attached and other various accessories.  Originally the riser and the limbs were actually one piece, as you would see in a bare bow or instinctive bow, however in most modern bows the riser is completely independent component.

Historically, the original construction material was wood and sometimes combinations of different types of wood. Other historical materials included horn and sinew (A piece of tough fibrous tissue uniting muscle to bone or bone to bone; a tendon or ligament) to create composite bows.  Beautiful laminated wooden bows and risers are still manufactured for lightweight, beauty, tradition, and style.

1212210010_L1Although some bows are still manufactured from various laminated hardwoods and are quite durable, the development of other modern components with materials such as carbon arrows and various strings, wooden risers were strained.  Therefore bow makers were forced to invest in the development of other more durable materials for competitive archers to maintain that competitive edge.  Competition target archers need enough arrow speed with great sight marks, with minimal string creep, since they practice a lot of shooting (anywhere from 150 – 1000 arrows a day).  Wooden bows will eventually break under the additional loads of pressure applied from the stress and strain.

Today there are two primary types of risers used by Olympic target archers, CNC machined aluminium and Carbon fibre or a combination of the two.  In the past, other materials and manufacturing methods were used such as forging and casting.

Forging

fir_m04_t04_03.2

This method hammers a metal bar under high temperature and high pressure that results in an extremely strong riser. Typically forging is an expense development process which requires machining, straightening and painting with very few variations.

Casting
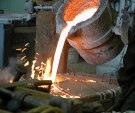
ben-castingUsually a mix of aluminium and magnesium were developed with either die-casting or sand-casting methods.  Still available in the market today with low-to-mid range bow are a relatively cheap to make once you have the mould.

.

CNC Machined Aluminium

42013

A computer controlled method to machine a riser from stress-relieved aircraft grade aluminium alloy until they weigh less than 3 pounds. Sometimes, in order to reduce the costs, risers can be extruded through a die to minimise the amount of machining required. CNC risers are usually anodised to provide a hard wearing finish.

Carbon Fibre

applyingcf

A method of layering synthetic fibres usually over a dense foam core mould, which is cured with resin epoxy to develop an extremely strong and lightweight riser. Although this method can be expensive to develop and test with, the process has almost infinite number of possibilities in terms of strength and flexibility of design.

Currently, the market is primarily CNC Machined Aluminium with overlayed Carbon Fibre to gain the best of both worlds. Who knows what the future holds for risers as target archers look to find the competitive edge and manufacturers investigate in cost savings.

Archery takes you places

ArcheryOnce you decide to become a competitive archer you will need to start planning to travel. Traveling is a big part of competitive archery, and the higher the level of competition, the further you need to travel.

Indoor archery can take you all over the planet at the upper levels however most competitions can be “mailed-in” because the conditions are controllable. For indoor archery, I have had the pleasure of visiting Louisville, Kentucky a couple of times for the NFAA Indoor Championships and Las Vegas, Nevada for the World Indoor Championships.

bb45s5817Since, hosting any outdoor archery tournament requires a fair amount of space, in Canada, you will need to travel a lot. Canada is the world’s second largest country by total area and stretches about 5000 KM (3000 Miles) from the Pacific Ocean to the Atlantic Ocean.  Since 2009 to participate in the Canadian National Outdoor Championships I have visited Laval, Quebec; Halifax, Nova Scotia; Delisle, Saskatchewan; Victoria, British Columbia and this year our family will travel to Woodstock, New Brunswick.

Even competing at the provincial level requires a lot of travel since the province of Ontario is larger than Egypt, Spain or France and therefore even for Provincial competitions you will have to travel a lot. I have visited London, Sudbury, Ottawa, New Market, Petawawa, Caledon, Athens, Peterborough, Toronto and Sault Ste. Marie. All this and I do not participate in every tournament.

Budget is a large factor in participation; our family uses our family vacation budget to participate in tournaments. Unfortunately, only the highest level of Canadian archer receive funding to help pay for travel, lodgings, tournament fees and equipment. For the rest of us, it often falls on us or our parents to help fund those Olympic dreams.

So if you are planning to venture in the realms of competitive archery, I offer the same advice that was afforded to me when I started. “Start saving now” however be assured that it is a worthwhile investment.

My Bow

IMG_7304Recently, one of my Tumbler followers asked me to share the details of my competition bow since they were moving towards competitive archery and wanted to know about my bow. First, I will explain the story of how I got to my current bow.

I have been searching for the perfect bow for me since the day I started shooting. Finding the perfect bow takes experimentation, trial and error. Your bow is a personal preference, so much so that in ancient times, it was a person’s most treasured possession and many kings were entombed with their bows. Finding the perfect bow may take years… and it may change as you grow, change and develop.

When I was just starting out at 9 years old, I needed a light mass weight bow. Something that would not damage my bow arm long term however would allow me to practice a lot. I was a good shot however VERY small for my age. I was able to come across the Fiberbow riser with a mass weight of only 599 grams, less than half the weight of other bows and it allowed me to practice a lot with less fatigue. This was a great bow until a couple of years ago, when I became stronger than the bow.

So before training for the Canada Games, I switched to the Cartel Midas 25” riser. I love that bow, it helped me win a Silver at the Canada Games and it took me to the World Indoor Championships in Las Vegas . This was an awesome bow for me as a cadet, however, with the change of divisions and greater distances as a junior I need to generate more power for outdoor shooting. Therefore I switched to a 23” Midas Riser and increased my limbs to 36 pounds. On initial tests I was able to top 196 feet per second and had to add additional weights to consistently settle on 194.5 fps. This is high for a recurve archer with only a 25” draw length.

IMG_7317My new bow is as follows…

  • 23” Cartel Midas Riser
  • 36# MK Archery Medium 1440 limbs
  • Cartel Spectra Sight
  • Cartel XD Stabilizer system with Midas V-bar
  • AAE Extended Clicker
  • Cartel Rest
  • Cartel Cushion Plunger
  • Custom String

Wow, this bow is amazing; I hardly feel the shot. The limbs are the smoothest I have ever shot. The limbs use carbon foam-core technology and are extremely smooth and straight. I love my new bow and it is the perfect bow for me right now. Although bow selection takes time and experimentation I hope you too can find the perfect bow for you.

Vision – Glasses, Contacts and Archery

Being an archer, competitive or recreational, does not require perfect 20/20 vision. E Perez asked…

I’m not sure if you’ve worn glasses before but if so, do you have any suggestions on archers who used glasses and are now switching to contacts? I’ve recently switched from glasses to contacts and my aiming is way off!

I can relate to this question, when I started shooting I had 20/20 vision, and around high school I needed glasses. I have not tried contacts yet, however it was an adjustment. Remember, the purpose of a corrective lens helps refract the light or images into in focus so you can see. Check out this website that explains how your vision works and how corrective lenses affect vision.

Wearing glasses or contacts can sometimes be a challenge for archers, since we actually stand to the side of the bow, not directly behind it. Therefore we are always viewing things on an angle, add the complexity of a corrective lens and it may be difficult to clearly focus on the target. It depends on the strength and thickness of the corrective lenses. I have a friend who can not shoot with her contacts on. The angle of the bow, combined with the angle of her contacts and she can not see her string alignment at all, which can affect your group.

Picking glasses out also presents a challenge because of the angle of the lenses and the thickness of the frames. My sister can not shoot with her prescription glasses because the frames are too large for the angle of the bow and she can not see her string alignment. If you need corrective lenses, it may take some trial and error experimenting to find out what works best for you.

I’ve recently switched from glasses to contacts and my aiming is way off!

If you are able to see the target and string alignment in focus, consider your arrow groupings.

Groups open up: Your brain could be simply catching up with your new perception, give it some time and practice. If the groups do not get better, then try shooting with your glasses on again and comparing the results.

Groups still tight; just off center: Move the sight. Even the smallest change can affect everything else, your vision is a large change.

Moved your sight; no change: Check your form, since many things can affect your your arrows including plucking the string.

Vision is important however not as important as good form. In fact, you may have read my earlier blog about legally blind South Korean archer, Im Dong-hyun, who broke the world record at the London 2012 Olympic Games. Im Dong-hyun has only about 20% vision in his right eye and only 10% in his left eye.

Your eyes can deceive you, don’t trust them – Obi-Wan Kenobi Star Wars

Your vision is important, however you may want to focus on making sure the shot “feels” the same every time, this is the key to success. For me, my coach still insists everyone warm-up with the following exercise to help us focus on feel not vision.

Close-Open-Close Warm-up 

  1. Close your eyes and draw your bow to full draw; focusing on your form. Try to make sure all your muscles and bones are in the same position with the same amount of pressure
  2. Quickly open your eyes to move the sight to the target
  3. Close your eyes and then shoot.

I hope I have provided some guidance and answered your question. If any other readers have experienced changes from moving to contacts from glasses, we would love to hear from you.

Getting Started in Archery

Archery is one of the best sports because it can be social, competitive, fun, and casual, you just need to decide what you want to get out of it.  Recently the interest in archery has sky-rocketed since the movies the Hunger Games, Brave and the Avengers.

Archery is so popular that Britain right now, with London Olympics finishing recently,  MPs are demanding its return and politicians have participated in training sessions with current and future Olympians.

This is not a local phenomenon either, there are tons of articles throughout North America about the increased interest in Archery. I am sure there are even more throughout the world since I have seen a lot of blogs about people who have or want to give it a try and I have also seen a lot of questions and comments about how to get started.

Well, here is a quick simple step-by-step guide.

  1. Find a archery club : Archery clubs exist everywhere; your school may even have an archery club. You can also contact your provincial, state or national archery organization. Most Provincal Sports Organization (PSO) or National Sports Organization (NSO) are now online and they will either have a listing of clubs or you can contact them directly for one
  2. Setup a take a beginner class or a private lesson : Most clubs offer regular lessons for both beginner and advanced archers. Alternatively you can contact a private coach, like myself, and setup a private session.

It’s that simple and once you have tried archery; you’ll be hooked.

Since, the hardest part about getting started in archery is finding information. Check out my links page for links to Ontario, Canada, USA, and International organizations to help you find an archery club close to you.  Once started, you can talk with your club or coach and they can provide some insight on how you can get the most out of archery.

Shooting with a Clicker

Every competitive Olympic recurve archer uses a draw length checker or “clicker”. A clicker is a device that assists an archer to draw their bow consistently.  The clicker rides along the side of the arrow and produces a “clicking” sound after it passes over the point, hence the name “clicker”. By consistently measuring the draw length of the arrow, you get a consistent power off the bow and therefore a more consistent grouping of arrows resulting in better scores.

There is a lot of debate of when you should start to use a clicker. Anyone who wants to advance and develop smaller groups should start using a clicker as soon as possible. HOWEVER, since clickers take a lot of discipline, patience and practice, maturity is the key factor; age maturity and shooting maturity. If you are disciplined and maintaining consistent form, then you are ready for a clicker.

Recently, one of my readers asked:

I just wanted to ask, with regards to the form, if I should be expanding my chest during the draw (pulling your shoulders back towards the spine) in order to activate the back muscles to take the load rather than the arms.

Shooting a clicker is a relatively simple process however; it requires the use of back muscles to create something called back tension. By compressing the rhomboid major muscles (between the shoulder blades and spine) together, it will draw the arrow past the clicker for the shot when you are at full draw.

First, you need to determine the ideal location for your clicker. Have a friend mark where the tip of the arrow is at full draw. This will be the initial starting location for your clicker. There are tons of clickers on the market however there are two basic types of clickers; riser-mounted or sight-mounted. Depending where the initial starting location is measured it will help you determine the type you need.

Once you have mounted your clicker follow this shot process.

  1. Nock the arrow, with the arrow under the clicker and on the arrow rest.
  2. Raise the bow and draw towards your anchor point.
  3. Continue to draw the arrow until the tip of the point is still just in contact with the clicker.
  4. Aim and while still maintaining, squeeze your rhomboid major muscles together.
  5. Once you hear the “click”, relax your fingers and finish the shot.

It is important that you are able to reach your anchor point at full draw. The clicker needs to be within the distance so your rhomboid major muscles can activate the shot. Remember, over the course of an entire day of shooting, your muscles weaken and you will have to work harder to draw the same amount, it may need to be adjusted to find the ideal location for entire day of shooting.

Important: Once you have determined your clicker location, leave it alone. Making any adjustments will affect all your sight marks, and they will need to be adjusted too.

If you have never used your rhomboid major muscles before this is going to take some time to master. Practice using your rhomboid major muscles with the following exercise.

With palms down and your forearms parallel to the floor, bring your fingertips together at chin level. Try squeezing your rhomboid major muscles together. You should witness your fingers spread apart about an inch. This is all the space you need to activate the clicker at full draw.

You can also check out this website for exercises to help develop strength in your rhomboid muscles.

The mastery of a clicker is essential for any competition archer. You will need to work on it regularly however once you master the process a clicker will become your best friend.

Twisted Limbs

Arguably, the MOST important part of the bow are the limbs, since the movement of the limbs transfers energy to drive the arrows to the target. Investing in well-manufactured limbs can be the best move any archer can make. Since consistency is the number one requirement for any archer, you want to avoid any twists. Wood/Fibreglass limbs perform well however can be prone to warping in areas where temperature changes a lot. Carbon fibre layers help strengthen the limb and reduce the tendency to twist.

After purchasing a new set of limbs, one of the first things an archer should do is align their limbs to their riser. Alignment of the limbs means the string should appear to run right down the center of the limbs thru the center of the riser.

I highly recommend the purchase of a new set of limbs for any archer; however, the purchase of a good used set can be an option for a new archer who is still learning the sport. When purchasing a used set remember any twist will cause inconsistent flight of arrows, check for limb distortion (often called limb twist). Viewing the bow strung with the limbs from either end of the bow, if one or both of the limbs have a slight twist, you may have limb twist.  If the distortion is only slight sometimes it can be cured with one of three methods.

1)       Cold Bump Method

Attempt to straighten the limb using the “cold bump” method. If a limb has developed a slight twist from improper stringing, this method often will correct the problem. Grab the bow by the riser with your dominant hand. Use your other hand to grip the bow limb slightly above the twist. Slowly twist the limb in the direction opposite of the distortion, and then quickly release the limb. Repeat this process several times until the limb properly is aligned.

2)       Warm Wet Submerge Method

Submerge the twisted limb in a tub of hot water for 3 to 4 minutes. The water should be no warmer than a hot bath, around 105 degrees Fahrenheit. This is just hot enough to mildly loosen the glues in a laminate. Remove the limb from the water, then slowly twist the limb in the direction opposite of the distortion. Release the twist slowly and examine the limb for straightness. Repeat the twisting procedure several times until the limb is straight.

3)       Low Heat Method

Twist the limb in the direction opposite the distortion and hold it in place. Have an assistant heat the limb using a hair dryer. Hold the hair dryer 6 to 10 inches from the limb, and slowly move it up and down the length of the limb. Heat the limb slowly for 2 to 3 minutes, then release your hold and examine the limb for straightness. Repeat the heating procedure as necessary until the limb is straight.

In my opinion, it is not worth playing with twisted limbs or possible physical injury and especially where ranking is important, competitive archers should not risk the possible performance dip . New well-manufactured limbs are very forgiving of a poor release, feel smooth and are more affordable than ever. Cartel Doosung and Bow Korea offer a complete line of limbs for everyone including introductory limbs, the new Midas MPS limbs for intermediate archers and MK Archery Vera/1440 limbs for competitive archers.

2012 Midas Riser

Late in 2010, I switched to the Cartel Midas riser and I have been extremely happy with it ever since. In fact, I switched just 6 weeks before winning my spot to the Canada Winter Games. It also was my primary bow for the World Indoor Archery Championship in Las Vegas. As part of the being on Team Canada, I was required to have a duplicate bow for international competitions. So my sponsor, Cartel Doosung sent me the new version for 2012.  Personally, once the indoor season is complete, I will be switching to the new 2012 Midas version as my primary bow.

Like Guy Fieri from Diners, Drive-ins and Dives says “It’s Money” …

The new Cartel 2012 Midas Riser is being produced in cooperation with BowKorea, one of the bright new specialist manufacturers on the highly competitive Korean archery scene. The new 2012 model is available in both 23” and 25” version for both left-handed and right-handed archers and is machined out of AL7001 CNC aluminum. It weighs only 1.14kg for 23” or 1.2 kg for 25” version, and along with the original black, blue, red and silver they have added white and green. Constructed with holes throughout the body for the windiest days and maintains the natural wood handle.

Along with the dual options for your cushion plunger, this year’s model includes a highly detailed clicker extension and the innovative side-to-side adjustable limb pocket system. So now, not only can you adjust the tiller, the new limb pocket system allows you to adjust the actual limb pocket for adaptability to a wide variety of international limb fittings (ILF) limbs.

If you are considering a new riser, check out the new 2012 Cartel Doosung Midas.